How to manage follow up emails
Managing follow up email messages using Auto Follow Up for Outlook
Not only that you can setup Auto Follow Up to automatically send follow up email messages on your behalf, but you can also easily manage active & past follow up tasks using the familiar Outlook interface.
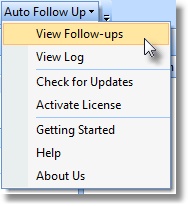
To manage your follow up tasks, click on the Auto Follow Up Outlook toolbar, then choose View Follow Ups.

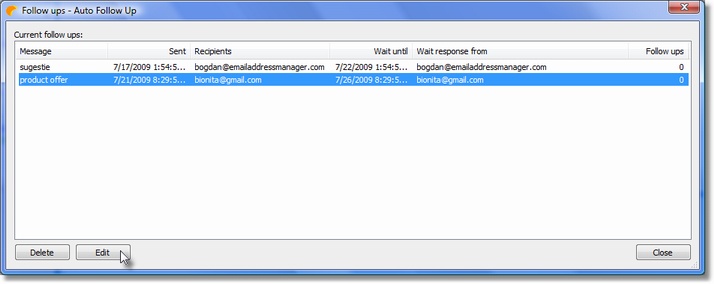
This action will open the management window of Auto Follow Up. Here you can see all your active follow up items and you can edit or delete them:
|


|
|

Also, by using the View Log option, you can view a log of all past events related to your follow ups, including error messages.
Auto Follow Up for Outlook: Functionality
Auto Follow Up - flash tutorials on follow up emails;
How does the follow up software work? Functionality description;
Creating follow up emails for already sent email messages;
Showcase: customer follow-up leads;
Auto Follow Up: Options window explained;
How to manage follow up email messages;
Follow up autoresponder;
Outlook Follow Up add-in;
Using the program only to notify yourself when a contact didn't reply, without sending a follow up email;
Purchasing and registering Auto Follow Up.
Auto Follow Up works within Microsoft Office Outlook, as a COM add-in. Relying on its intuitive, user-friendly interface, it uses Outlook data and functions to generate & send follow-up emails. Auto Follow Up works with any Outlook version, starting from Outlook 2002.
As a registered customer, you will benefit from:
24/7 free service support;
One year free upgrades;
Instant live update system;
30 days money back guarantee;
Discounts on other DS Development products.
System Requirements:
Microsoft Windows 2000, Windows XP, Windows 2003, Windows Vista (x32 or x64), Windows 7, Windows 8 (x32 or x64).
Microsoft Office Outlook 2002 (XP), 2003, 2007, 2010, 2013 (x32 or x64).
|